

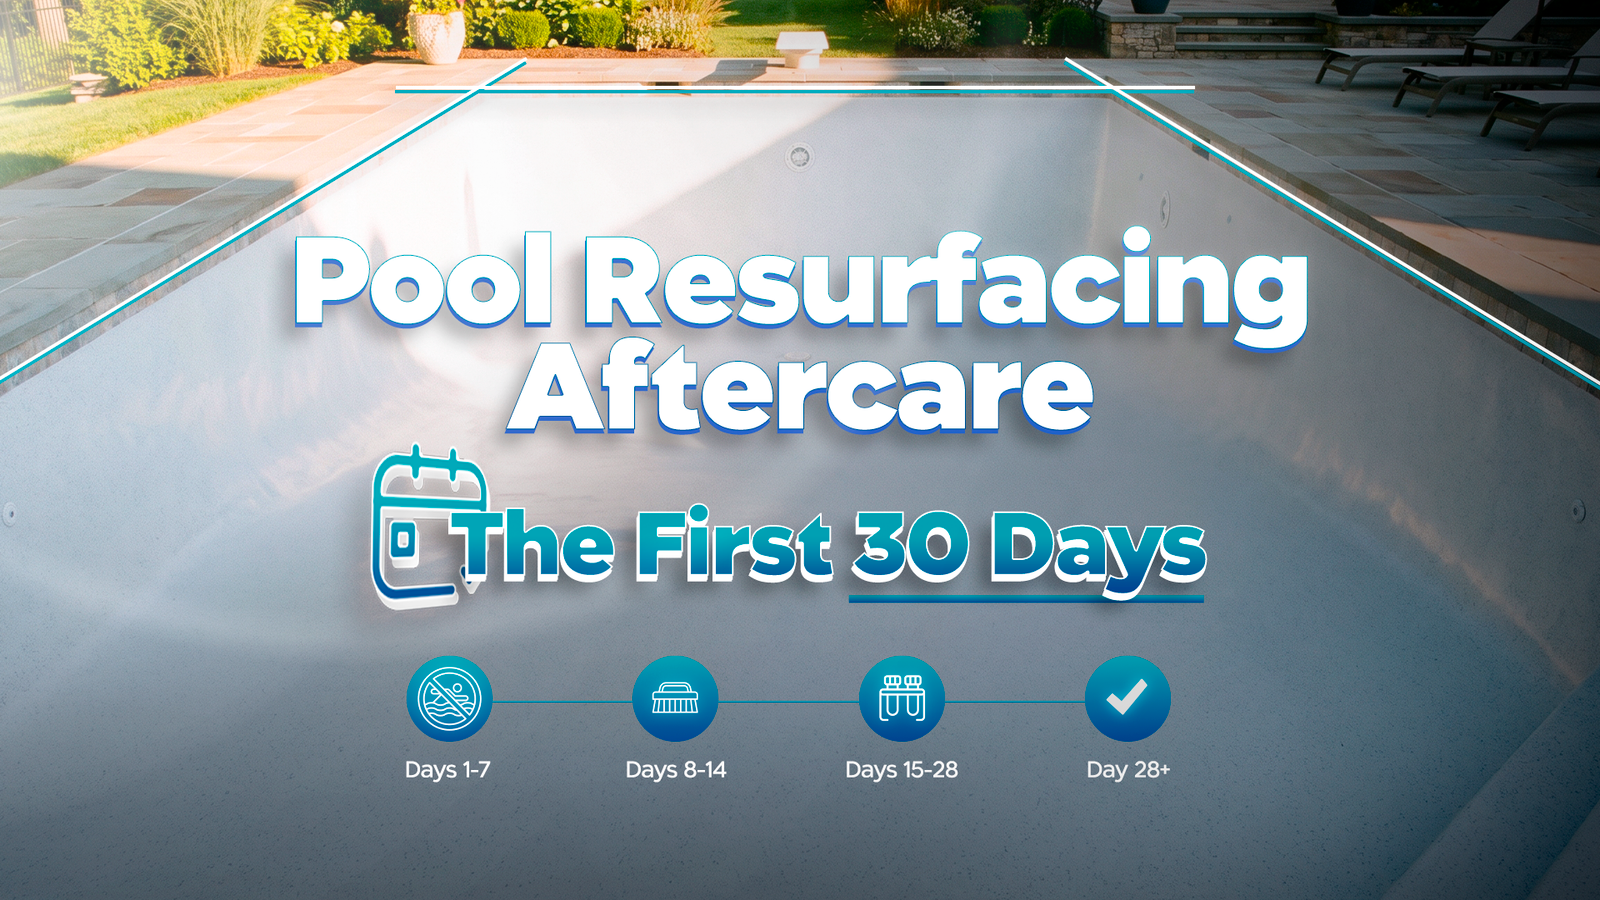
Your pool just got a brand-new surface. The crew packed up, the gate closed behind them, and now you’re standing there staring at an empty shell — or a freshly filled one — wondering: now what?
The resurfacing job is done, but in a very real sense, the next 30 days are just as important. What you do (and don’t do) during this startup period directly affects how your new surface looks and performs for the next 15 to 20 years.
Why the First 30 Days Matter So Much
Pool resurfacing materials — whether Diamond Brite, Florida Stucco, quartz aggregate, or Pebble Tec — all need time to cure properly after application. During this window, the surface is still bonding, hardening, and stabilizing. Get the water chemistry wrong or skip the early brushing steps, and you can end up with blotchiness, staining, or white calcium deposits that are incredibly difficult to remove later.
This isn’t an attempt to scare you. It’s genuinely the kind of thing that’s easy to do right if you know what to expect — and easy to mess up if nobody told you the rules upfront.
The problem is that many homeowners come home to a filled pool and zero written instructions. If that’s you, this guide covers everything you need to know: what happens on day one, what brushing schedule to follow, how to manage water chemistry, and what to watch for as your new surface settles in.
The First 48 Hours: Fill Slowly, Don’t Stop
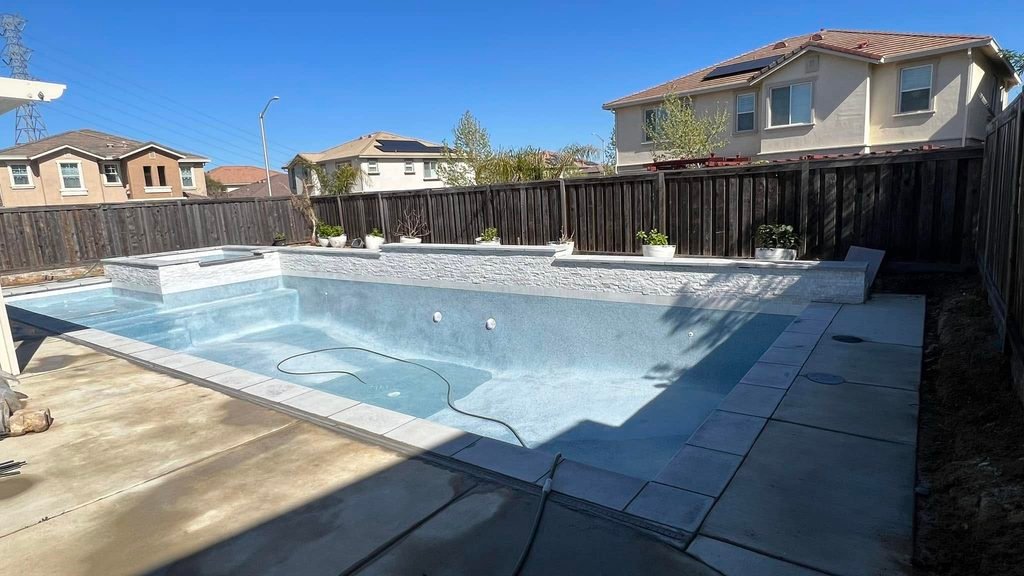
The moment filling begins, the clock starts. There’s one rule that’s non-negotiable: once you start filling, you cannot stop or significantly slow the water until the pool is full.
Here’s why. As the water rises, it creates a wet line on the new surface. If filling pauses for more than a few minutes, that waterline dries and creates a permanent tide-mark stain — a line baked into the fresh surface that chemical treatment later won’t fully remove. This is called a “fill line” and it’s entirely avoidable.
What to do:
- Use a garden hose to start filling up the pool, try to keep the stream from blasting only one spot
- Keep the water flowing continuously until the pool is at normal operating level
- If for any reason filling has to pause, do your best to keep the waterline moving and cover the pause as quickly as possible
When can you turn on the equipment? Your resurfacing contractor should advise you on this, but as a general rule, you’ll start the pump and filtration once the pool is fully filled. Running the pump before the pool is full risks drawing air, which isn’t great for the equipment or the cure.
Day 1–3: The Startup Chemistry Process
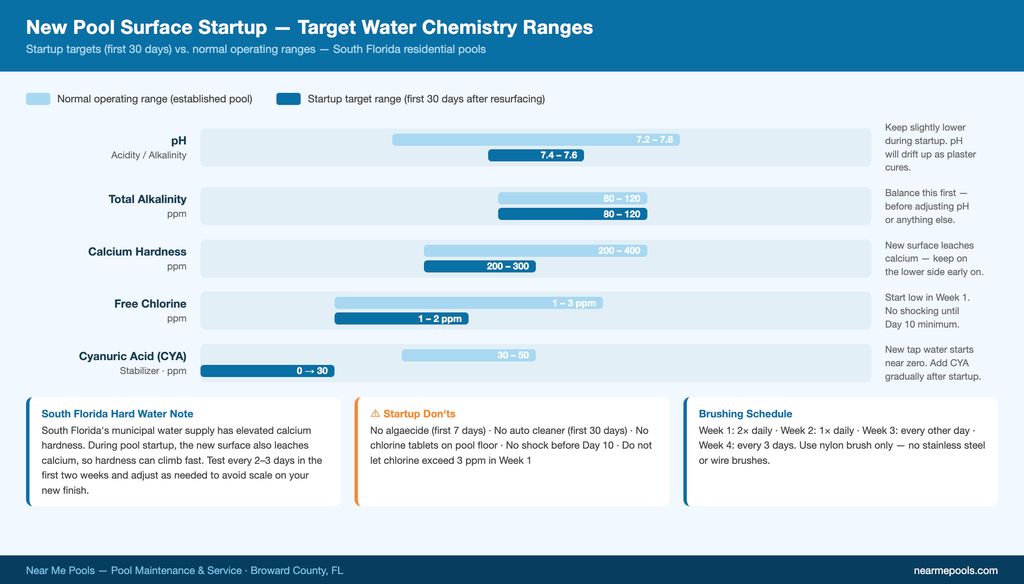
The first chemical treatment for a newly resurfaced pool is not the same as your regular weekly maintenance. This startup process — sometimes called “pool startup chemistry” — is designed specifically to protect a fresh surface during curing.
Your resurfacing contractor may handle the initial startup chemicals themselves, or they may leave that to you or a pool maintenance company. Either way, here’s what needs to happen:
Brush the surface first. Before adding any chemicals, brush the entire surface with a pool brush — yes, before the water is even balanced. This first brushing removes the plaster dust (a fine white calcium layer that forms on the surface of fresh plaster and aggregate finishes) and helps the water begin to saturate the surface evenly.
Balance in this order:
- Total Alkalinity (TA) — Target: 80–120 ppm. This is your buffer. Balance it before touching pH or you’ll chase your tail.
- pH — Target: 7.4–7.6. Keep it on the slightly lower side during startup.
- Calcium Hardness — Target: 200–400 ppm. New surfaces can leach calcium into the water; getting this right early helps prevent white blotching.
- Chlorine — Introduce slowly. Some contractors recommend starting with no more than 1–2 ppm during the first week and building from there.
- Cyanuric Acid (CYA) — If using stabilized chlorine, test before adding more. New water from the tap often has zero CYA.
What to avoid in the first week:
- No algaecide — certain algaecides can stain a fresh surface
- No automatic pool cleaners — the wheels and hoses can scratch or leave marks on a surface that hasn’t fully hardened
- No chlorine tablets dropped directly on the surface — this causes bleach spots. Always use a floating feeder or skimmer basket
- No shocking (high-dose chlorine) — wait at least 7–10 days before the first shock treatment
The Brushing Schedule: The One Thing Most Homeowners Skip
This is the step people skip because it feels tedious. Don’t skip it. Early, frequent brushing is the single most important thing you can do for a new surface during the first 30 days.
Here’s why it matters: fresh plaster and aggregate finishes off-gas a fine calcium film as they cure. If this film isn’t brushed off regularly, it settles and sticks, creating permanent blotches and discoloration. Regular brushing keeps the surface clean as it cures and helps the water chemistry remain stable.
Recommended brushing schedule:
| Week | Brushing Frequency |
|---|---|
| Week 1 (Days 1–7) | Twice daily — morning and evening |
| Week 2 (Days 8–14) | Once daily |
| Week 3 (Days 15–21) | Every other day |
| Week 4 (Days 22–30) | Every 3 days |
Use a standard nylon pool brush — not a stainless steel wire brush. Wire brushes can scratch the surface. Work systematically: walls first top-to-bottom, then the floor, then the steps and bench areas.
Water Chemistry in Weeks 2–4
By the second week, your pool should be holding chemistry more consistently as the surface finishes its initial cure. You can shift from twice-daily brushing to once daily, but keep testing the water at least twice a week during this period — not once a week like you might normally.
A few things South Florida homeowners specifically need to watch:
Hard water calcium creep. South Florida water supply is on the harder side, which means calcium hardness can drift upward more quickly than in other parts of the country. During the curing process, the surface can also leach calcium into the water. Keep calcium hardness in check — if it climbs above 500 ppm, you risk scale formation on your new surface that’s difficult to remove.
pH bounce. New plaster releases alkaline compounds as it cures, which tends to push pH upward. Expect to add pH reducer (muriatic acid or dry acid) more frequently than usual during the first few weeks. This is normal — it’ll stabilize after 30 days.
Chlorine consumption. Freshly filled pools and new surfaces tend to eat chlorine faster in the first few weeks. South Florida’s UV intensity makes this even more pronounced. Test chlorine daily in week one and every other day in weeks two through four. Add stabilizer (CYA) once your initial startup is complete if you’re using unstabilized chlorine.
When Can You Actually Swim?
This is the question everyone asks. The honest answer: it depends on the surface type and your water chemistry, not just a fixed number of days.
In most cases, you can swim once:
- The pool is fully filled
- Startup chemistry is balanced and stable (pH 7.4–7.6, chlorine 1–3 ppm, TA 80–120 ppm)
- The surface has had at least 24–48 hours of proper startup brushing and chemistry adjustment
For aggregate finishes like Diamond Brite, Florida Stucco, or Pebble Tec, the surface is more mature out of the gate than plain plaster, so the waiting window tends to be shorter. Your contractor should give you the green light — and if they say “wait 7 days,” there’s a reason.
What to tell the kids: “Not yet, but soon” — and if you need a backup, most contractors will give you a firm date.
Day 30: Your First Surface Check
After 30 days, the surface should be fully cured and your chemistry should be dialed in. This is a good time to do a visual check of the new surface:
- Uniform color? Some variation in aggregate finishes is normal (it’s part of the texture), but large blotchy patches of white or gray can indicate calcium scaling from unbalanced startup chemistry.
- Any rough patches? Run your hand along the walls and floor. The surface should feel consistent — Diamond Brite and quartz finishes have texture, but it should be uniform.
- Any dark staining? Early algae can take root in new surfaces if chlorine was low during startup. Address it quickly before it sets.
Now you can also:
- Introduce your automatic pool cleaner (robotic or pressure-side)
- Move to a standard weekly chemistry testing schedule
- Reduce brushing to once or twice per week as part of regular maintenance
A Note About the Long Game
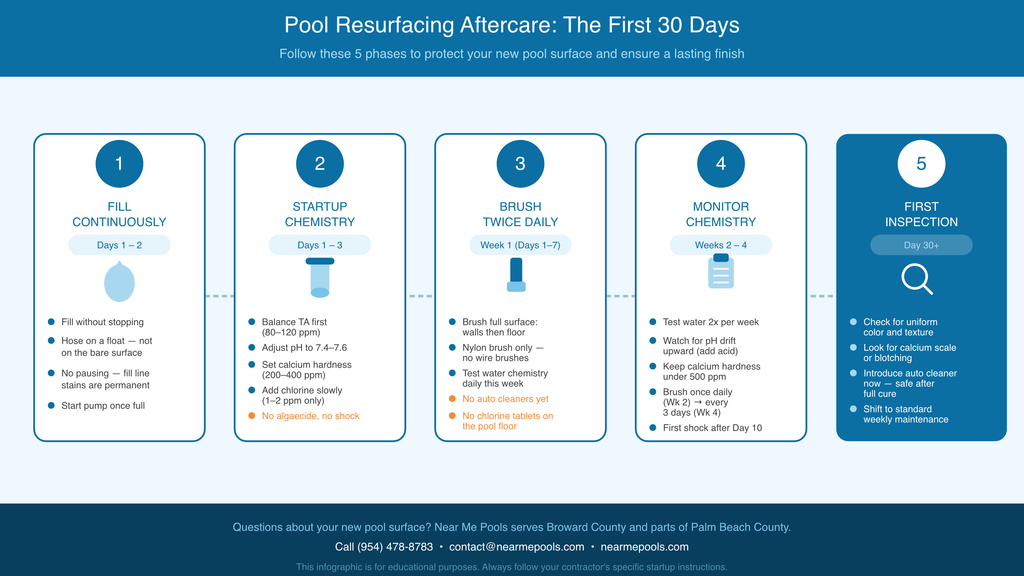
The first 30 days set the tone for years of pool ownership. A new Diamond Brite or Pebble Tec surface, properly started up and maintained, can look sharp for 15–20 years in South Florida conditions. The startup steps above aren’t optional add-ons — they’re what that lifespan estimate assumes you did.
The most common reason new surfaces look worn or blotchy within the first couple of years isn’t the material or the installation — it’s what happened (or didn’t happen) in those first 30 days.
We’re Here If You Have Questions
Near Me Pools handles pool maintenance and cleaning throughout Broward County, and we work with a lot of pools that have gone through the resurfacing process. If your new surface is showing early signs of scaling, your chemistry isn’t stabilizing, or you just want someone to walk through the startup process with you, feel free to reach out to our team — we’re happy to take a look and give you a straight answer.
You can also call us at (954) 478-8783 or email contact@nearmepools.com.
If you’re still in the planning stages and comparing your options, feel free to reach out to us so we can point you in the right direction.
Frequently Asked Questions
How long does it take for a new pool surface to fully cure?
Most resurfacing materials — including aggregate finishes like Diamond Brite and Pebble Tec — take approximately 28–30 days to reach full cure. The first week is the most critical. After 30 days, the surface is stable and you can transition to a regular maintenance routine.
Can I use my robotic pool cleaner right away?
No — wait at least 28–30 days before introducing an automatic cleaner. Wheels, tracks, and hoses can scratch or leave pressure marks on a surface that hasn’t fully hardened. Stick to hand-brushing during the first month.
Why does my new plaster look blotchy or uneven in color?
Some texture variation is normal with aggregate finishes. However, white or gray blotchy patches that appear in the first few weeks usually indicate calcium scaling from unbalanced startup chemistry — typically pH or calcium hardness that ran too high. Address it early with a professional if you’re unsure; early-stage scale is much easier to treat than established deposits. Our team at Near Me Pools can help you assess what you’re seeing.
Is it normal for pH to keep rising after a new resurfacing?
Yes — very normal. Fresh plaster and aggregate surfaces release alkaline compounds as they cure, which pushes pH upward. You’ll likely add pH reducer more frequently in the first 3–4 weeks than you normally would. It stabilizes after the cure period.
When is it safe to shock a newly resurfaced pool?
Wait at least 7–10 days before your first shock treatment. Before then, the surface is still curing, and a high-dose chlorine treatment can cause uneven bleaching. Use standard chlorine levels (1–3 ppm) during the first week and build from there. After the 10-day mark, you can begin your normal shock schedule.
Does South Florida’s hard water affect a new pool surface?
It can. South Florida’s water supply has elevated calcium content, which means calcium hardness can climb more quickly than in other regions — especially when you factor in evaporation and the calcium the new surface itself releases during curing. Testing twice a week during the first 30 days (rather than the standard weekly test) helps you catch and correct calcium drift before it scales on your new finish.
Near Me Pools serves residential and commercial pools throughout Broward County and parts of Palm Beach County. Learn more about our service area or contact our team.