

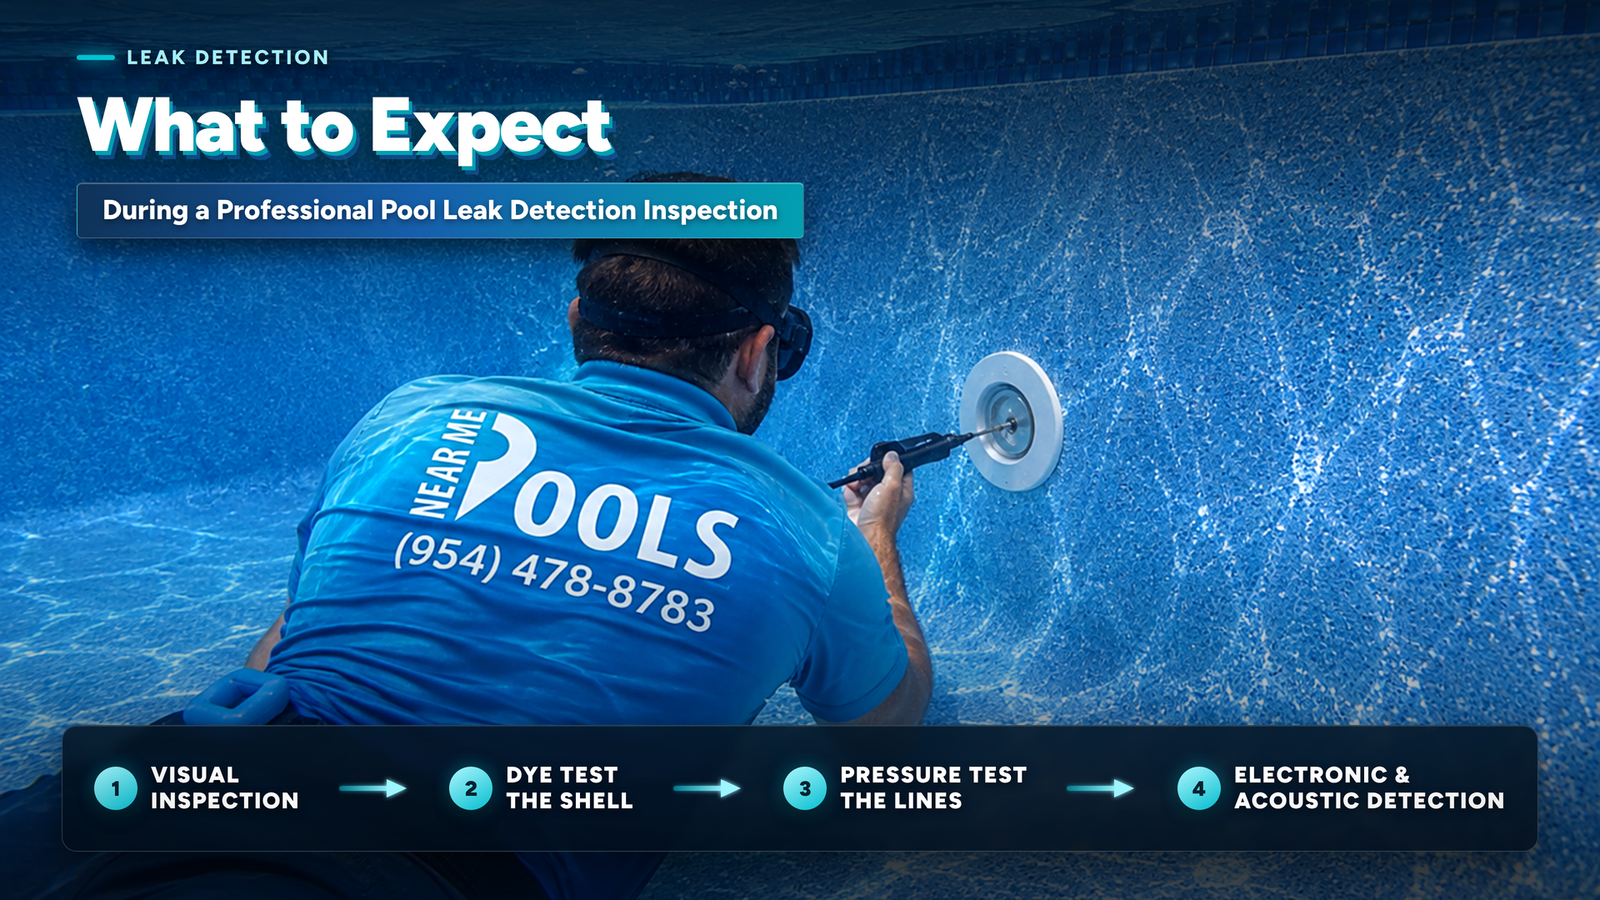
You did the bucket test. The pool dropped more than the bucket over 24 hours — which means yes, there’s a real leak somewhere. You know water is escaping. What you don’t know is where.
That question — where — is why professional pool leak detection exists. And if you’ve never had it done, the process can feel like a bit of a black box. What exactly are they going to do? How long does it take? Will they need to dig anything up? What happens if they find the leak — or don’t?
This is a straightforward walkthrough of what a professional pool leak detection inspection actually involves, what each method is designed to find, and what you can expect from the moment a technician shows up to the moment they leave.
Why Professional Detection Matters — And Why Guessing Doesn’t Work
A lot of homeowners try to locate their leak before calling anyone. That instinct makes sense. But here’s the challenge: most pool leaks are not visible on the surface. Even the ones that start at a visible fitting or crack often have water migrating along paths you’d never predict. Guessing where a leak originates and starting to poke around on your own can — and frequently does — make the diagnosis harder and the eventual repair more complicated.
Professional leak detection is methodical. Technicians follow a sequence of steps designed to systematically rule out areas and isolate the source. Each method builds on what the last one found (or didn’t find). By the end of the inspection, there’s no guesswork — there’s a specific location, a specific cause, and a clear plan.
That systematic approach is also what makes professional detection genuinely cost-effective, even if it feels like an extra step. Knowing exactly where a leak is means repairs are targeted, not exploratory. You’re not paying someone to dig up your entire backyard on a hunch.
Before the Inspection: What You Can Expect
When you schedule a pool leak detection inspection with Near Me Pools, the process starts before anyone arrives at your property. Here’s what helps:
Tell us what you’ve observed. How much water is the pool losing per day (even roughly)? Did the loss start suddenly or has it been gradual? Does it seem worse at certain water levels — for example, does it stabilize at the skimmer level? Does the pool lose water when the pump is running, or only when it’s off? These details help prioritize where inspection starts.
Don’t top off the pool the night before. A fresh fill makes it harder to assess the rate and pattern of water loss accurately. If your pool is significantly low, that’s useful information.
Make sure the equipment pad is accessible. The technician will need to work around the pump, filter, heater, and plumbing lines, so clearing any obstructions in that area in advance saves time.
[IMAGE PROMPT: Photorealistic 8K, wide shot of a South Florida residential pool equipment pad — pool pump, filter canister, heater, and PVC plumbing lines neatly arranged. A homeowner in casual summer clothes stands nearby while a pool technician in Near Me Pools branded shirt reviews a checklist clipboard. Bright morning Florida sunlight, screened lanai and pool water visible in background. Clean, organized, professional atmosphere. Hyper-detailed photography style.]
Alt text: Pool technician reviewing inspection checklist with homeowner at the equipment pad before a professional pool leak detection service in South Florida.
Step 1: The Visual Inspection
Every professional leak detection inspection starts with a full visual walkthrough. Before any specialized equipment comes out, a good technician wants to see everything.
What gets examined
The visual inspection covers the entire pool from waterline to equipment pad:
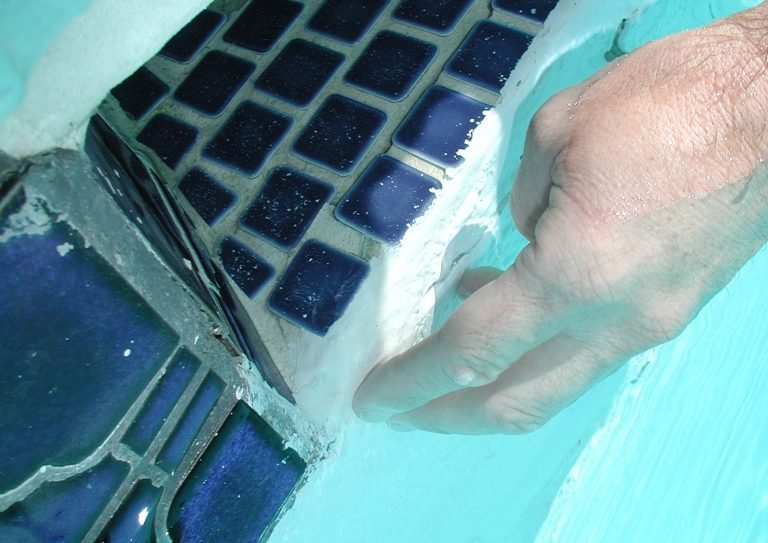
- The pool shell — The technician walks the entire perimeter of the pool, looking for visible cracks, separation at the coping, staining or efflorescence (white mineral deposits), or any sign that water has been migrating through the shell surface
- The skimmer(s) — Checking for separation between the plastic skimmer body and the surrounding plaster or tile, a hairline crack in the skimmer throat, or loosened fittings
- Return jets and wall fittings — Any fitting that penetrates the pool wall is a potential leak point. The technician looks for staining, loose fittings, or deteriorated gaskets
- Light niches — Pool light fixtures are housed in niches that penetrate the pool wall. The conduit sleeve behind the light is a common water escape route
- The equipment pad — The pump, filter, heater, valves, and all visible plumbing connections are checked for active drips, water staining, or corrosion patterns that indicate long-term moisture
What the visual inspection tells you
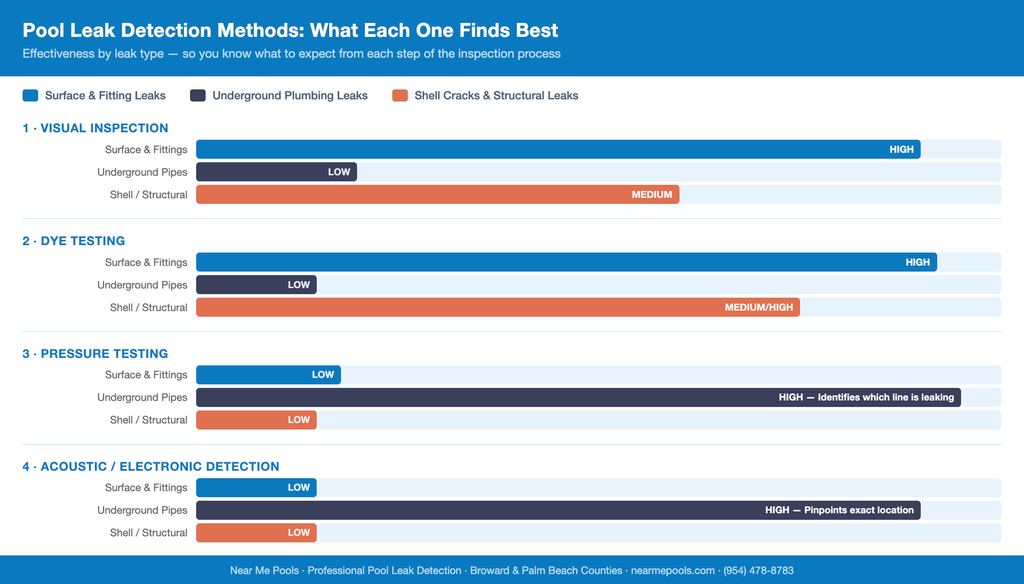
A thorough visual can locate leaks that are immediately apparent — active drips at equipment fittings, obvious shell cracks, or clear separation at the skimmer. In some cases, it confirms the leak location outright. More often, it narrows the field: this section looks fine, these two areas warrant closer examination. That’s exactly what the next steps are designed to do.
Step 2: Dye Testing
Dye testing is used to confirm suspected leak points at specific locations. It’s precise, non-invasive, and fast — and it’s particularly effective at fittings, the skimmer, return jets, light niches, and any area where water movement is suspected but not visible.
How it works
The pool pump is turned off to eliminate water movement. The technician introduces a small amount of tracer dye near the suspected leak point — typically using a syringe to direct the dye precisely. If water is escaping at that location, the dye gets pulled toward the gap or crack and visibly drawn through it. If there’s no leak at that point, the dye disperses slowly in the still water without being pulled anywhere.
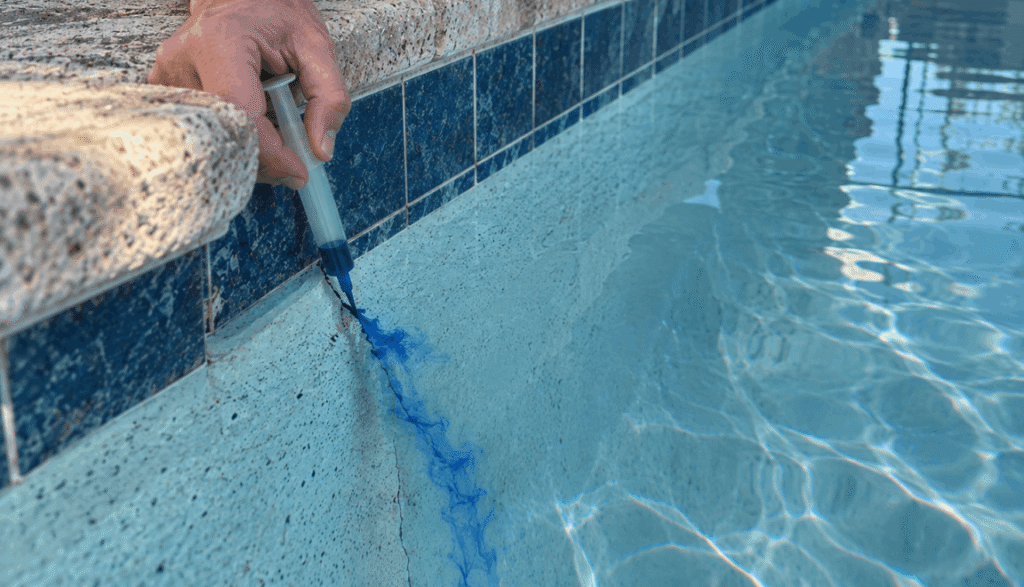
It looks simple, but the accuracy depends entirely on knowing where to look. An experienced technician tests methodically — working around the pool’s fittings in order, documenting what each test shows, rather than randomly testing wherever the dye happens to go.
What dye testing finds best
Dye testing excels at surface and near-surface leak points: skimmer gaps, deteriorated gaskets on return jets, cracks in visible plaster, and light niche issues. It’s the go-to method for anything at or above the pool floor. For leaks deeper in the plumbing system — underground or behind walls — dye testing has limits. That’s where pressure testing takes over.
Step 3: Pressure Testing the Plumbing Lines
If the visual inspection and dye testing doesn’t locate the leak — or if the evidence points to an underground plumbing line — pressure testing is the next step.
What pressure testing does
Each plumbing line connected to the pool is isolated and tested individually. The technician plugs the line at both ends, then pressurizes it using a specialized pump. A line that holds pressure is intact. A line that bleeds pressure has a leak somewhere along its length.
This is the most reliable method for diagnosing underground pipe leaks — the category of pool leak that’s genuinely invisible from the surface and accounts for a significant share of serious, long-term water loss cases.
Which lines get tested
Any line that runs underground between the pool and the equipment pad is a candidate for pressure testing. This typically includes:
- Suction lines — the pipes that draw water from the pool to the pump
- Return lines — the pipes that push filtered water back to the pool
- Vacuum and cleaner lines — if your pool has a built-in cleaner port
Pressure testing isn’t just about confirming a leak exists — it identifies which specific line has the problem. That precision matters enormously when it comes to repair planning. Repairing a single identified line is very different from exploratory digging to find an unknown source.
If you’ve confirmed a leak but don’t know where it is, this is one job where guessing gets expensive fast. The team at Near Me Pools uses pressure testing as a standard part of the inspection process — it’s how we confirm what’s actually going on before any repair work begins.
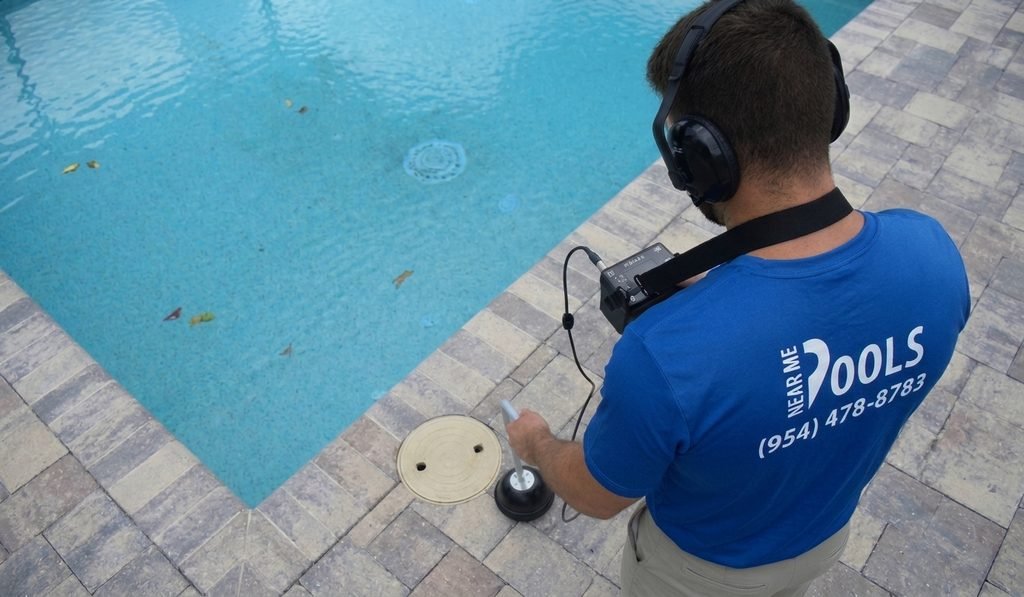
Step 4: Electronic and Acoustic Detection
For underground pipe leaks, pressure testing tells you which line is leaking. Electronic and acoustic detection can help narrow down where on that line the leak is occurring — which is important for minimizing the scope of any excavation needed for repair.
How it works
Specialized listening devices amplify the sound of water escaping under pressure through a pipe. Underground leaks create a characteristic noise signature that trained equipment can detect even through several inches of soil or concrete. The technician moves the sensor along the suspected line’s path, listening for the point where the signal intensifies — indicating the leak location below.
This technology doesn’t eliminate all need for excavation, but it dramatically reduces how much digging is required. The difference between “we know it’s somewhere along this 20-foot run” and “it’s right here at this point” is significant — both in labor time and in disruption to your yard.
When acoustic detection is used
Not every leak detection inspection requires this step. Acoustic detection is typically brought in when pressure testing has confirmed an underground plumbing leak and the technician needs to pinpoint the location before recommending a repair plan. If your leak turns out to be at the skimmer or an equipment fitting, you may never need this step at all.
How Long Does a Pool Leak Detection Inspection Take?
For most residential pools in South Florida, a full leak detection inspection takes two to four hours, depending on pool size, the number of plumbing lines, and what the inspection finds along the way.
Some inspections resolve faster — if a visual inspection and quick dye test immediately confirm the skimmer is the issue, there’s no need to proceed to pressure testing. Others take longer if the initial steps don’t locate the leak and a full pressure test of all lines is needed.
What it should never be: rushed. A thorough leak detection inspection is methodical by design. If a tech is in and out in 30 minutes, you have reason to wonder whether every potential source was properly evaluated.
What Happens After the Inspection?
At the end of the inspection, you should receive a clear answer on three things:
- Whether a leak was confirmed — and if not, what else could explain the water loss
- Where the leak is located — specific location, not a general area
- What repair is needed — and what that involves in terms of scope and disruption
Some leaks — like a failing gasket at a return jet or a small skimmer gap — can be addressed quickly. Others, like an underground plumbing leak, require more significant repair work. Either way, knowing exactly what you’re dealing with puts you in a much better position than waiting and watching the water level drop.
Summary
A professional pool leak detection inspection follows a systematic sequence: visual inspection first, then dye testing to confirm surface-level leak points, pressure testing to isolate underground plumbing leaks, and acoustic or electronic detection to pinpoint the exact location when needed. Most inspections resolve within a few hours, and the output is a precise answer — not a guess — about where your pool’s water is going and what it takes to stop it.
The methods exist because leaks hide. A crack in a return line 18 inches underground doesn’t look like anything from the pool deck. The systematic process is what makes it findable.
Ready to Stop Guessing?
If you’ve confirmed your pool is losing water faster than normal evaporation accounts for, the next step is a professional inspection. The team at Near Me Pools handles pool leak detection across Broward County and parts of Palm Beach County — using the full range of methods covered here.
Reach out to our team, give us a call at (954) 478-8783, or email us at contact@nearmepools.com. We’ll take a methodical look, give you a straight answer, and walk you through what the repair involves — no surprises.
Frequently Asked Questions
How do I know if I actually need a professional inspection or if it’s just evaporation?
The bucket test is the right first step — it’s a reliable, free method to distinguish between normal evaporation and an active leak. If your pool is dropping more water than the bucket over a 24-hour period, you have a real leak and a professional inspection is the logical next step. If you’re unsure how to run the test, our DIY bucket test article has more detail.
Will the technician need to drain my pool or dig anything up during the inspection?
Not necessarily, and not as a default. Dye testing is done with the pool full. Pressure testing is done with the plumbing lines isolated — no draining required. Excavation only becomes part of the picture if an underground plumbing leak is confirmed and a repair is needed. The inspection itself is designed to be non-invasive.
What if the inspection doesn’t find a leak?
It happens. If no active leak is found, the technician will walk you through other possible explanations for the water loss — including evaporation rate, splash-out, or equipment drain cycles. That’s still a useful answer, because it rules out the more serious causes and helps you understand what’s normal for your pool.
Can I do dye testing myself at home?
You can purchase pool dye test kits, and some homeowners do try this on their own. The challenge isn’t the dye — it’s knowing where to look and interpreting what you see. An inconclusive or misread result can send you in the wrong direction. For anything beyond a very obvious suspected point, professional dye testing is more reliable because the technician knows where and how to test systematically.
How soon can a pool leak be repaired after the inspection?
It depends on what’s found. Equipment leaks (pump fittings, filter valve o-rings) can often be addressed same day or shortly after. Skimmer repairs typically take a day or two once materials are on hand. Underground plumbing repairs require more planning and scheduling but are generally completed within a week or two of diagnosis. Near Me Pools can give you a realistic timeline once the inspection is complete.
Does the pool lose water faster when the pump is on or off?
This is actually a useful diagnostic question. If the pool loses water faster when the pump is running, the leak is likely on the pressure side of the plumbing (return lines). If it loses water faster when the pump is off, the leak is likely on the suction side or in the pool shell itself. If there’s no difference, the pool shell or fittings are more likely candidates. It’s worth tracking this before your inspection — that information helps the technician prioritize where to start.